
The Incident Statistics Report summarises your incident data in terms of frequencies, means and standard deviations. You can create a report based on all records in the database, or a subset (e.g. only incidents involving a certain activity, or only incident associated with adverse outcomes).
This information can help you track trends over time and identify when changes to programs or risk management plans are required.
Click here to view a Sample Incident Statistics Report.
There are two tasks involved in creating an incident statistics report:
- Export the incident statistics into an excel file; and
- Use mail merge in Microsoft Word to create the final report as a word document.
The following instructions describe how to complete each of these tasks.
Task 1: Export the incident statistics into an excel file
- Open the database and login with the password provided.
- Select “Incidents” and “Table View”
- To create a report based on all incidents, select “Show All” OR To create a report based on a subset of incidents, select “Find” and enter the appropriate criteria (e.g. “Type of incidents = adverse outcomes) and press <enter>. More information on Find requests is available here.
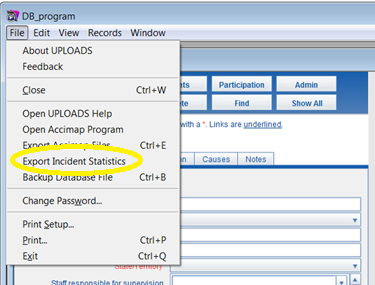
- Click on the “File” button located on the top left under DB_program icon.
- A drop down box will appear. Click on the “Export Incident Statistics” button. A box will appear telling you the information has been sent to the “Report” folder
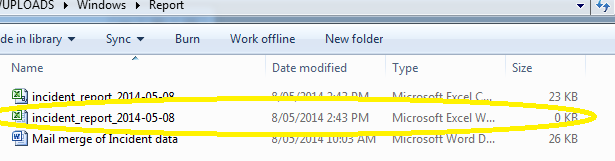
- Open the “Report” folder located in the UPLOADS folder.

- You will see that datestamped Excel and CSV file have been created – this is a summary of your incident data.

Task 2: use mail merge in Microsoft Word to create the final report as a word document.
- In the “Report” folder you will also see that there is a file called “Mail Merge of Incident data.doc”.

- Open the document “Mail merge of Incident data”. The following box will appear, click No.

- Once open, click on the tab “Mailings” and “Start a Mail Merge”. A drop down box will appear. Select “Step by Step Mail Merge Wizard”

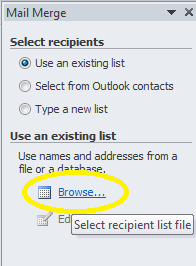
- A Mail Merge panel will appear on the right hand side of the document. Click through to Step 3 of 6. Select “Browse”.
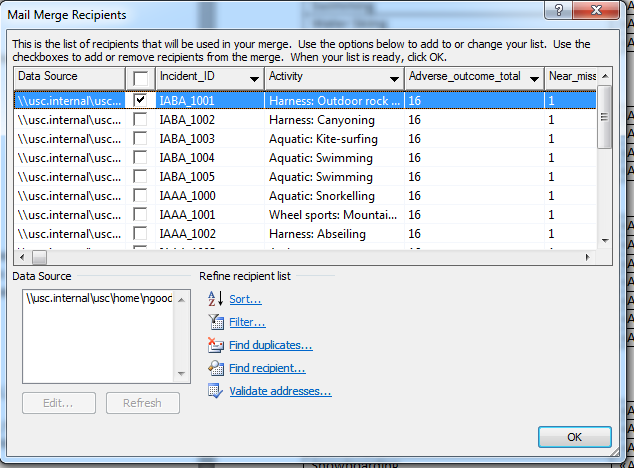
- Navigate to the folder “Report” and open the Incident Statistics Excel file that you created.
- This will bring up a list of “Recipients”. Select only the first recipient, and press OK.
- Click through the mail merge to Step 6.
- The Mail Merge is now complete.
- Check the document has numbers in the tables. This is the data from the Excel Worksheet opened in step 5, which has now merged into the tables. Within the mail merge panel, there is an option provided to print the report.
- Now save the document to a different location, with a different name. Keep the original mail merge document intact for future use.
